I found a bunch of really awesome tutorials on how to make planets in Photoshop. I think some of these can be applied in Gimp too, and I will try some of them later, probably posting some of the results here.
The problem with Gimp is that it doesn't have an advanced layer blending options like Photoshop does. For example, you have to rely on a filters to apply shadows, which is destructive editing. In photoshop, you can adjust or turn off the shadow anytime!
Most of the tutorials use a texture, but I've seen some that make use of the filters to generate a planet-looking surface.
Here's the first one. It should be enough to guide you, it's universal and with some creativity you can extend the notions learned to create even more awesome images ( right-click and then select "View Image" to view it fullsize):

This tutorial was created by Dinyctis, on deviantArt.
Another tutorial by the same author is about making planetary rings to spice up your planets.
This is a video tutorial on the same subject, yet this time the outcome looks like a space movie poster:
Make a realistic Star Field! Although, I doubt they looks like this in reality... you can check Hubble Ultra Deep Field for a comparison :).
Create a meteor impact with a planet.
And finally, create an absolutely goergeous looking SuperNova:
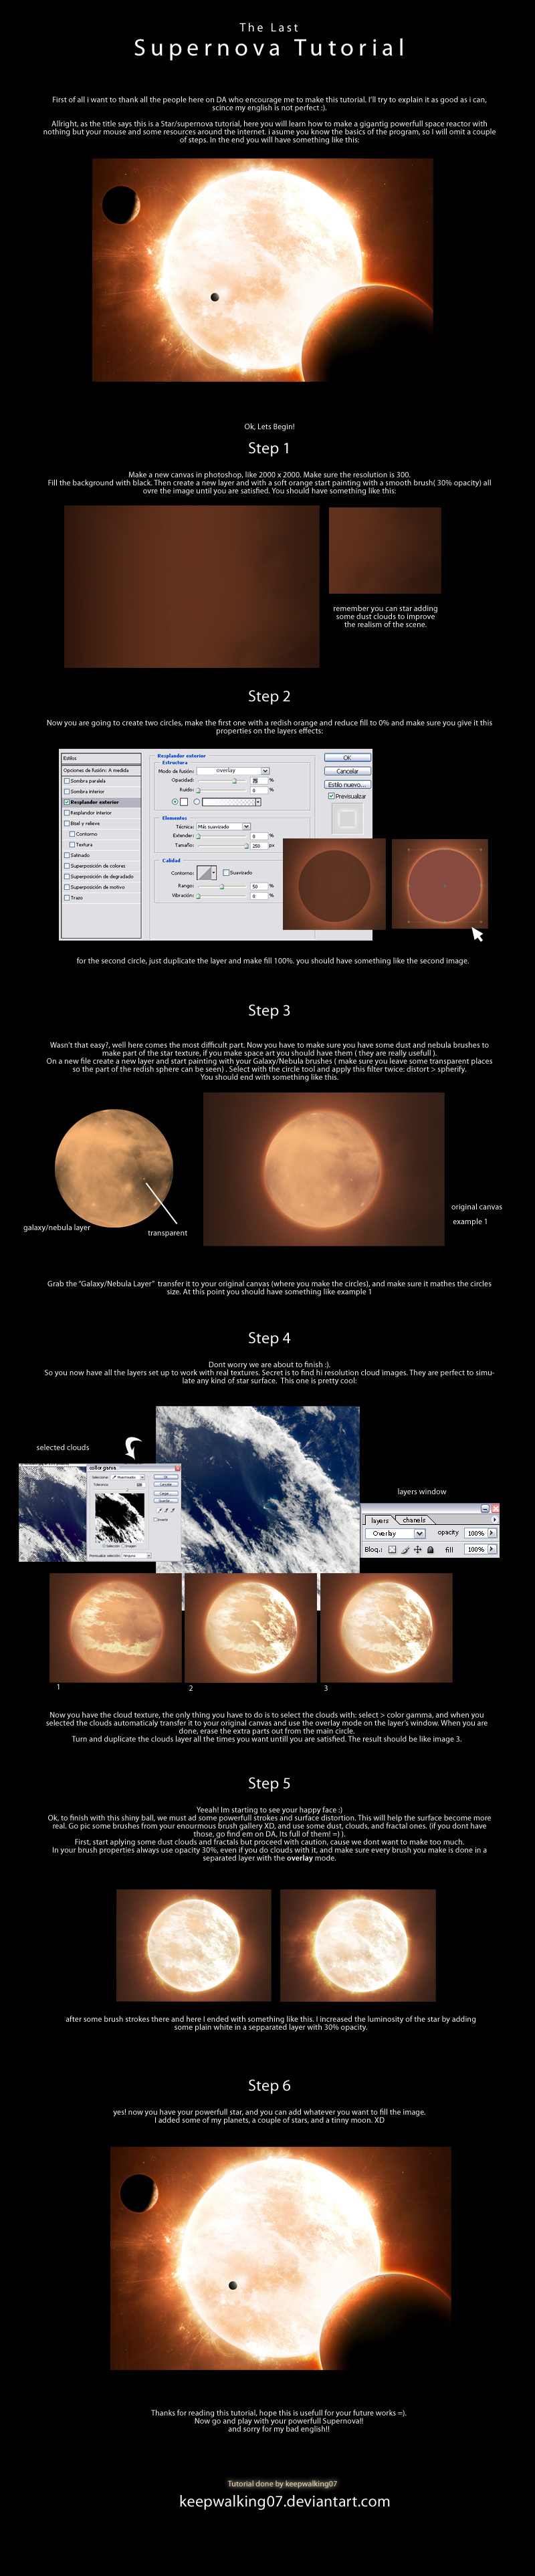
Tutorial link.
These should be enough to make a you a space artist! Happy editing ;).
Showing posts with label how to. Show all posts
Sunday, February 24, 2013
Monday, August 8, 2011
Make that subject shine!
Do you wonder sometimes about emphasizing a bit the atmosphere of a picture, and make the subject look a bit more "angelic"?
I'll teach you how to do that in this tutorial, using GIMP.
Choose a picture with somebody you want to modify. Take notice that this technique doesn't work well on all pictures. For the picture, I've chosen one that I downloaded from http://www.sxc.hu,
a free stock images site.
Duplicate the layer, and then desaturate it(Colors>Desaturate).
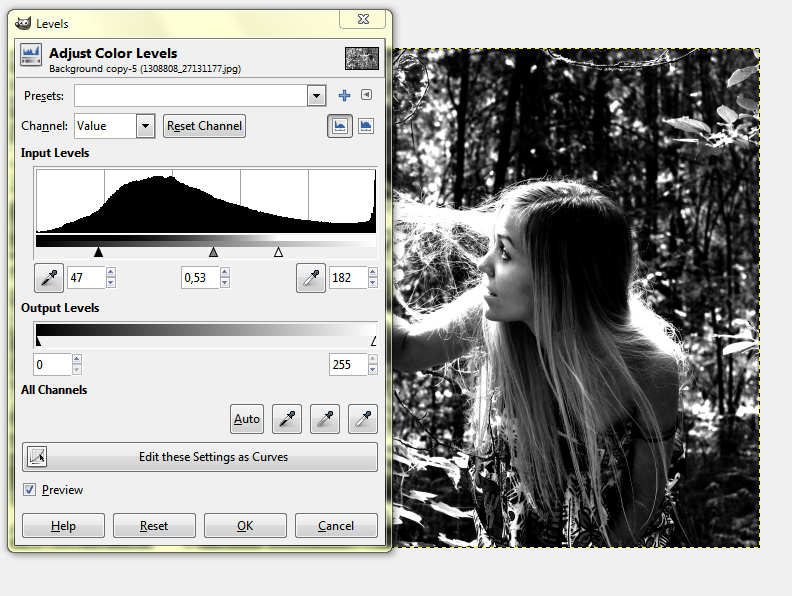
We'll have to increase a bit the contrast, so adjust the color levels to do so(Colors>Levels).
Now apply some Gaussian Blur (Filters>Blur>Gaussian Blur). A value of 65 seemed to work fine on this particular photo.
Because the blurring decreases a bit the contrast, we'll have to amplify it a bit more again. It's not compulsory to use the Levels tool, you can adjust the contrast with Color Curves as well.
Next, set this layer mode to Overlay.
...and then start carefully painting on the blurred layer to "reveal" our subject even more.
Make a new layer(Layer>New Layer), take your soft brush again, but this time change the color to something gold-like.
Draw an outline on your subject.
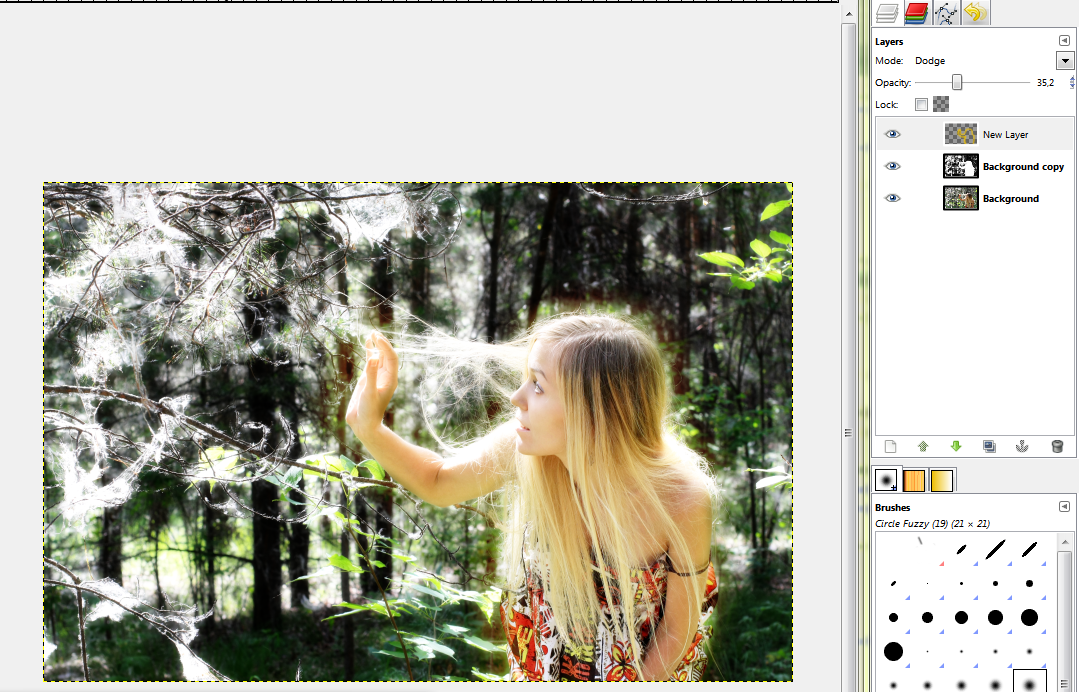
Set this layer mode to Dodge, and reduce the Opacity to 35%.
We can now make the final adjustments to the color of this image. There are 2 ways to do this. The faster is to just Colorize the desaturated overlay layer.
But in my opinion it's more convenient to select the first layer, and change the colors using Color Curves.
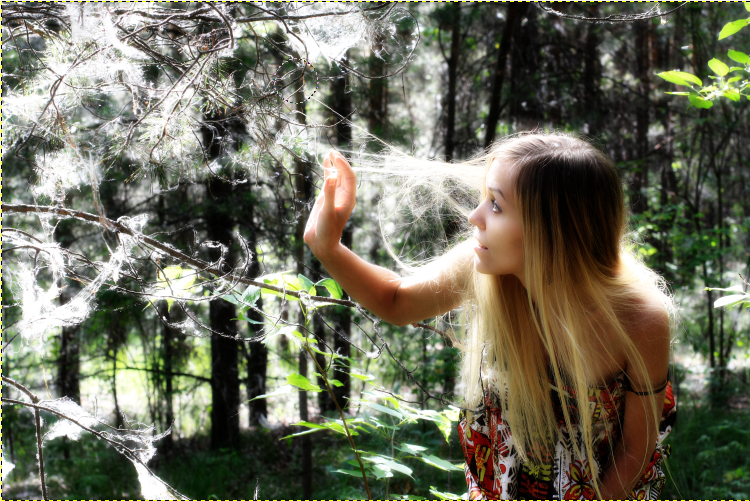
This is the final image:
Have a nice day!
I'll teach you how to do that in this tutorial, using GIMP.
Choose a picture with somebody you want to modify. Take notice that this technique doesn't work well on all pictures. For the picture, I've chosen one that I downloaded from http://www.sxc.hu,
a free stock images site.
Duplicate the layer, and then desaturate it(Colors>Desaturate).
We'll have to increase a bit the contrast, so adjust the color levels to do so(Colors>Levels).
Now apply some Gaussian Blur (Filters>Blur>Gaussian Blur). A value of 65 seemed to work fine on this particular photo.
Because the blurring decreases a bit the contrast, we'll have to amplify it a bit more again. It's not compulsory to use the Levels tool, you can adjust the contrast with Color Curves as well.
Next, set this layer mode to Overlay.
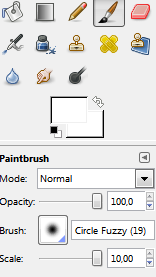
Select a white soft brush, turn the scale up to 10.....
...and then start carefully painting on the blurred layer to "reveal" our subject even more.
Make a new layer(Layer>New Layer), take your soft brush again, but this time change the color to something gold-like.
Draw an outline on your subject.
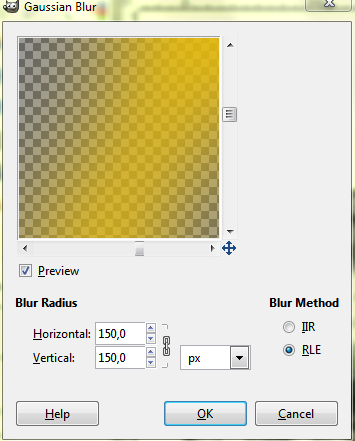
Now apply some Gaussian Blur to this layer. Pick a high value. In my case, I picked 150.
We can now make the final adjustments to the color of this image. There are 2 ways to do this. The faster is to just Colorize the desaturated overlay layer.
But in my opinion it's more convenient to select the first layer, and change the colors using Color Curves.
This is the final image:
Have a nice day!
Subscribe to:
Posts (Atom)